Sexy AI User Guide
Getting Started
1.1. Introduction to Image Generation
At Sexy AI, you can use many different options to get the output you desire. Let's start with a quick overview of various elements you'll encounter.
Workflows
Workflow refers to the core AI engine (e.g., Sexy 1.0, Pony, SDXL). Each workflow has its own set of training data and is unique from other workflows in what and how it will perform. Depending on what you are trying to accomplish, one workflow may be more effective than another.
Models
Model refers to a style preset within a workflow (Dreamshaper, Lustify, PonyRealism, etc.). Model availability depends on its compatibility with the workflow (core AI engine) selected.
Prompts
Prompt refers to the text input used to influence the generation. A positive prompt tells the AI what you do want to see, and a negative prompt indicates what you do not want to see in the final output.
Settings
Setting refers to a modifier that can be applied to a generation (e.g., batch size, clip skip, CFG scale, LoRAs).
1.2. Platform Tour & Account Setup
Membership Tier Overview and Subscribing
Signing in without subscribing allows you to browse and react in Communities (emoji reactions). Tier 1 and Tier 2 members can generate, view libraries, and post/comment/create in Communities.
Generally, Tier 2 provides members with double the GPU time per rolling 24-hour period, priority queuing, and double concurrent generations compared to Tier 1. For up-to-date information on membership tiers and their features, please visit Account > Billing.
Subscriptions
Currently, there are two payment processors available for subscribing:
- Epoch allows you to set up recurring payments that will be debited from your account on a monthly or annual basis depending on your preference.
- Gift Card allows you to purchase a gift card/key that can be redeemed for a one-time purchase (1-month, 3-month, or 1-year).
Subscriptions FAQs
I can't use Epoch or Gift Card. What can I do?
We only accept payment through Epoch and Gift Card. If you are encountering an error when trying to purchase a subscription, you can reach out to support@sexy.ai or to the payment processor directly for assistance.If I cancel, will it deactivate my membership?
You will be able to continue using Sexy AI until the end of your paid billing cycle.How do I upgrade from Tier 1 to Tier 2 or downgrade from Tier 2 to Tier 1?
For either upgrading or downgrading, you'll need to cancel your current active subscription by logging into your Epoch dashboard. You can then purchase a new subscription once your current paid period ends (expiration date located under Account > Billing).
If you'd like to upgrade prior to the expiration date, please reach out to support@sexy.ai and indicate that you have canceled and are ready to upgrade.
Dashboard Navigation
Workflow Selector
In the header bar (top of page), there is a dropdown menu that allows you to select the workflow you'd like to use. To select a workflow:
- Click the dropdown menu
- Click the workflow you'd like to use
Model Dropdown
For most workflows, you'll see a dropdown menu at the top of the box beneath the header bar. To select a model:
- Click the dropdown menu
- Click the model you'd like to use
Settings Panel
The options in the settings panel will change depending on the workflow you select. Most workflows include a positive and negative prompt section. Here is a list and brief description of other settings you might see:
- Height and Width: Dimensions of the content you'd like to generate
- Batch Size: The number of images you'd like to make in one generation (creating a higher number of images does not impact the GPU time used - it is more efficient to select a higher number)
- CFG: How closely you would like the AI to follow your prompt (higher is not always better)
- Seed, Subseed, Seed Strength: Control randomness and reproducibility
- Clip Skip: Controls how literally the AI interprets your prompt
- Sampler: Algorithm used for image generation
- Destination: Where you want your content to go in your Library/Folders once generated
Settings Deep Dive
CFG Scale
CFG Scale (short for Classifier-Free Guidance) controls how closely the AI follows your prompt when generating an image.
Low CFG (1–4) → The AI takes more creative freedom. Results might be more abstract, loose, or unexpected — but also sometimes less accurate or relevant.
Medium CFG (5–8) → A balanced result. The AI generally follows your prompt while still adding some creative interpretation.
High CFG (9–12) → The AI follows your prompt very closely. Images tend to be sharper, more vivid, and more literal — but can become overly intense or rigid. In some cases, CFG set too high can result in a 'bad' generation (blurs, static).
Most users find a sweet spot between 7 and 9, but it's worth experimenting depending on your prompt.
CLIP Skip
CLIP Skip controls how literally the AI interprets your prompt when generating images. It adjusts how many layers of your prompt the AI "reads" or processes, which can influence how tightly or loosely it sticks to what you wrote.
| CLIP Skip Level | Effect | Best For |
|---|---|---|
| 1 | Literal, strict detail-following | Technical, precise prompts |
| 2 | Mostly accurate, slightly rigid | Controlled creativity |
| 3 | Balanced — detail + style | Most general prompts |
| 4 | More interpretive | Artistic, creative images |
| 5 | Dreamy, abstract | Loose, imaginative outputs |
LoRA
LoRA stands for Low-Rank Adaptation, a method used to enhance AI-generated images by adding specialized, lightweight training data to a base model. Think of a LoRA as a focused style or concept add-on — it helps the AI better understand and render specific characters, poses, styles, or features that the base model alone may not handle well.
- LoRAs can be selected from a dropdown list or added manually using a hash code (found on sites like Civitai) depending on the workflow/model.
- You typically control how strong the LoRA's influence is using a strength value (e.g., 0.1 to 2.0).
- Some LoRAs may require trigger words in your prompt to activate their full effect.
Please be sure that the LoRA you choose follows Sexy AI's Terms of Service to prevent any negative moderation action such as content removal or suspension.
Steps
Steps control how many times the AI refines an image before finishing it. Each step is like a brushstroke in a multi-layered drawing — the more steps, the more detail the AI can add.
| Step Range | Result Quality | Best Used For |
|---|---|---|
| 5–15 | Very rough, often broken | Not recommended unless testing speed |
| 16–25 | Moderate detail, may work for simple prompts | Fast experiments or inspiration |
| 26–35 | High quality, refined textures and lighting | Most prompts, especially with some detail |
| 36–40 | Maximum polish, photorealism, or complex scenes | Detailed prompts, final renders |
Pro Tip: More steps don't always mean a better image — sometimes they over-refine the image, making it look too soft or unnatural. Test what works best for your prompt!
Sexy 1.0 Workflow Overview
Good general-purpose engine that balances quality and speed.
Good For:
- Photorealistic scenes, illustrations, fantasy art
- Quickly iterating on concepts, styles, and compositions
Limitations:
- Good hands & faces
- Text in images
- Complex scenes - Multi‑character compositions or intricate interactions may blur or overlap unintentionally
- Non-square outputs
- Over‑saturation & artifacts - High CFG or extreme prompts can lead to oversharpened edges, noise, or color clipping
Prompting Tips for Sexy 1.0
Follow a clear descriptor order
Structure your prompt from broad to specific. A common pattern is:
Subject → Context/Action → Style/Artist → Lighting/Color → Camera/Composition → Details
Example: "A serene forest clearing with a woman standing in mist (subject/context), oil painting style, John William Waterhouse style (style/artist), soft golden morning light, 35 mm photograph composition, detailed bark and foliage textures."
Use comma or pipe separators
- Commas (… , …) for natural breaks
- Pipes (… | …) when you want to group tightly related concepts
Example: "Cyberpunk cityscape, neon reflections, rainy night | (blade runner style:1.2)"
Leverage weight modifiers
- Parentheses increase emphasis: (element:1.3)
- Brackets decrease emphasis: [element:0.7]
Example: "(dramatic lighting:1.4), [background clutter:0.6]"
Additional Best Practices:
- Keep CFG around 7–9 for balanced creativity vs. fidelity
- Use steps in the 25–35 range to avoid under‑ or over‑refinement
- Include "masterpiece" or "best quality" judiciously as generic quality boosters
- Watch prompt length - aim for 3–7 well‑chosen phrases rather than a single run‑on sentence
- Experiment and iterate - small tweaks can yield surprisingly different results
Prompting 101
To create good images with AI, you will need to understand how to properly craft your prompt. This means you must understand the following concepts:
- The components of a positive prompt
- The usage of negative prompts
- Special operators and image generation steps
Components of a Positive Prompt
Your positive prompt should be a short and concise list of terms that describe the elements you want to see in your image. You should start with the following types of terms:
| Prompt Component | Description | Example |
|---|---|---|
| Subject | what do you want to see in the image | an elf |
| Paragraph | The artistic style of the image | photography, anime, painting |
| Style modifier | Keyword that fine-tunes the style | hyper-realistic, abstract |
Positive Prompt Examples
- a painting of an elf, realistic
- a realistic photo of an elf
- an abstract drawing of an elf
| Prompt Component | Description | Example | Notes |
|---|---|---|---|
| Major Details | Keywords that must be included | Physical keywords, Setting keywords, Outfit keywords | |
| Additional Details | Specific characteristics to fine-tune your image output | Sci-fi, dystopian | Can be mixed |
| Lighting | The way you want light to factor into your image | Cinematic lighting, dark | Can be mixed |
| Resolution | How sharp and detailed you want the image | Highly detailed, sharp focus, 4k, 8k, ultra quality | Only include one resolution-based modifier in your terms list |
| Color | Describe the overall look of the image or colors you want to feature | Black and white, sepia, gold | Include no more than a couple of specified colors |
Positive Prompt Examples
- a photo of an elf,sitting on the ground,forest background,realistic,detailed
- a photograph of an exhausted elf, siting in a dark forest,hyperrealistic,detailed
- an abstract forest background, an elf,gorgeous face,alluring features,ultradetailed,ultraquality
Components of a Negative Prompt
Because of the wide range of concepts associated with certain terms, you may see elements you don't want in your final image. Negative prompts can be helpful in clarifying what you don't want to see in your final image.
Negative Prompt Example
Elves are both creatures that exist in high-fantasy settings but also as part of Christmas mythology. The AI may therefore combine elements of both into your image. However, you can add Christmas to the negative prompts to get a result like the following image
Positive
an elf, in a cottage
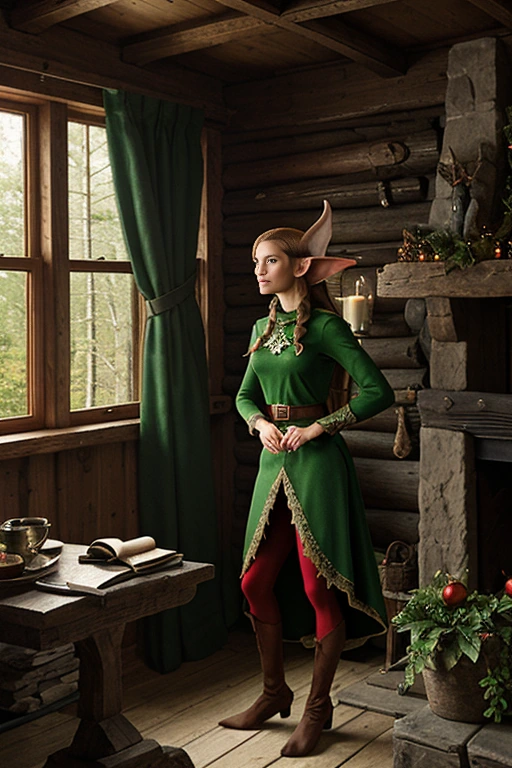
Negative
Christmas

Negative Prompt Tips
When it comes to using negative prompts, you should keep a few things in mind
- Keep the negative prompt list short.
- Always start an image with no more than three negative prompts and only add to the list as needed.
- Avoid conflicts between your positive and negative prompts.
- Be as broad as possible with your negative prompts.
Keyword Conflict
- Two or more keywords that produce image elements that contradict each other.
- Without proper weighting and balance the contradicting terms will distort the image, and produce unwanted results.
- It is advised, when creating a new prompt to take the time and add each keyword at a time to check for problem terms.
Keyword conflict example
Positive a woman wearing a green dress
Negative: green
Positive A man wearing white socks, with big feet
Special Syntax
Special syntax refer to certain structures and punctuation in your prompts that the AI interprets in a specific way. The most basic special operator is a comma ,, telling the AI where one part of your prompt ends and the next part begins. However, there are a variety of other special operators you can use to add nuance to your prompts and return a better image.
| Modifier | Effect |
|---|---|
Parentheses () | Surrounding a term in parentheses increases the weight of the term 10%, making it more prominent. |
| Additional parentheses increase the weight further multiplicatively. | |
For example, ((term)) will increase the weight of the term by 21%, and (((term))) by 33%. | |
Brackets [] | Brackets decrease the weight of the term by 10%, making it less prominent. |
These also stack multiplicatively; [[term]] reduces weight by 19%, [[[term]]] by 27%. | |
Backslash \ | If you want to use any of the literal ()[] characters in the prompt, use the backslash to escape them: anime_\(character\). |
Avoid using more than 3 layers of brackets or parentheses as this may create unexpected results. Additionally, weights may behave differently when used in negative prmopts compared to positive prompts. Test different weights to experiment with the result.
Keyword Weight Prompt Examples
Let's start with the basic prompt,
a woman, garden background

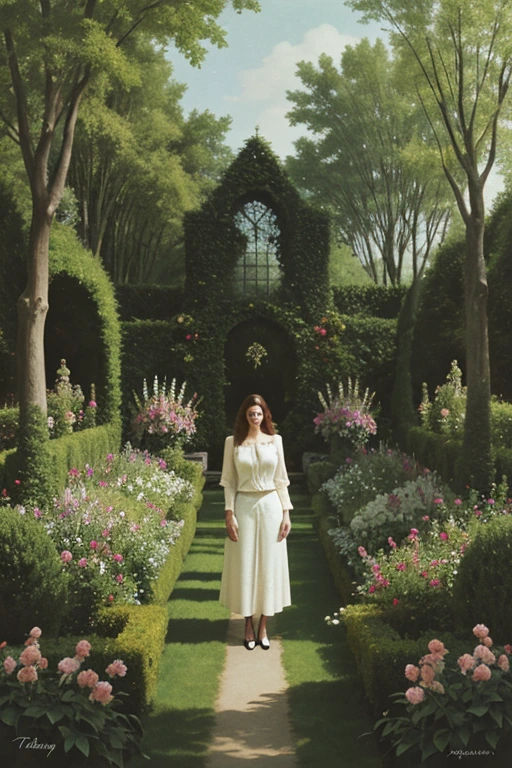
Now let's tone down the weight of a woman.
[a woman], garden background
- Notice how the garden background is now more apparent in the image.*
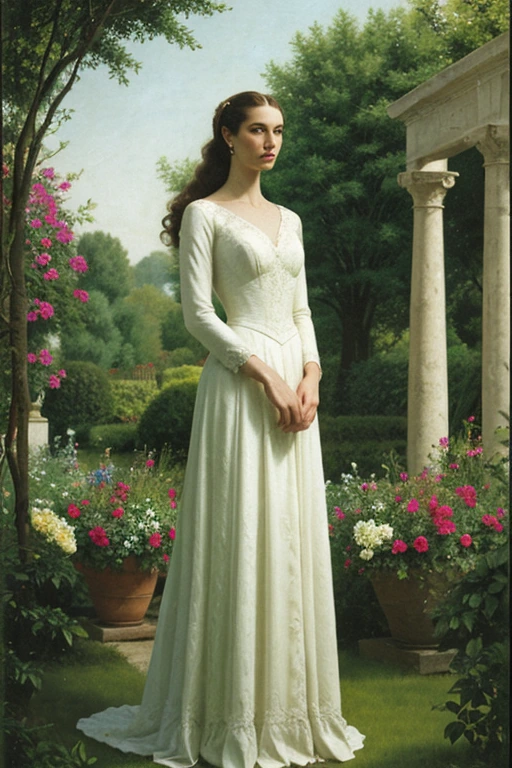
Now let's tone down the weight of
garden background
a woman, [garden background]Notice the woman being more in focus than the garden.
Additional Syntax
While the usage of parentheses and brackets is universal, some models support additional syntax. You can experiment with the following syntax:
(term:X.X), whereX.Xis a decimal number: This multiplies the weight of yourtermby the value ofX.X. A value less than one decreases the weight and a value greater than one increases the weight. It is recommended to keepX.Xbetween0.5and1.5
Prompt Blending
Prompt blending takes two or more concepts and merges them together in the final image. For example, you could use prompt blending syntax with apple and fire to create an apple that appears to be on fire.
[term1:term2:X.X]
- Combines
term1andterm2with blending control viaX.X. - When
X.Xranges from 0.2 to 0.5,term2is favored. - For values between 0.5 and 0.9,
term1is favored.
[keyword1:keyword2:0.3]
- Emphasizes
keyword2more.
[keyword1:keyword2:0.7]
- Emphasizes
keyword1more.
[term1|term2|term3]
- Blends three terms equally.
{term1|term2|term3}
- Requires the terms to appear/happen together.
{term1:term2}
- Blends the terms with equal weight.
(credit Meaca_g)
Steps and Weights
To understand the technical application of the syntax above, it's important to understand the basics of how the image is generated. At its core, the Stable Diffusion engine works on a series of steps. After each step, the image becomes more refined with diminishing returns as the number of steps increases. Sexy.ai generates images with 20 steps, meaning that your image is generated after 20 iterations.
 Practically speaking, the special syntax modifies how terms are applied during the step process.
- A
[term]will only be active for 0.9 of the frames, or 18 frames - A
(term)will be more active in all frames. - A
(term)[term2]will be averaged out. [term1|term2]will alternate every other step.[term:term2:X.X]will swap from term to term2 after the proportion given. For example,term1:term2:0.4would swap fromterm1toterm2after the 8th step (0.4 x 20 = 8)
Multiple Subject
Multiple subjects can be created by the following keywords and prompt phrases
Subject Combinations
| Prompt Component | Description |
|---|---|
| A man and a woman | Specify a man and a woman in the image. |
| Two men/two women | Request two men or two women in the image. |
| Various men/Various Women | Request various men or various women, allowing for diversity in characters. |
| Non-Specific Wording | Non-specific wording that allows for multiple characters. Create independent traits like hair and clothing without specifying. |
Group of man\woman\etc | Creates a random number of subjects in the image. |
Image Composition Tips
- The success of the image will depend on the type of shot, the engine, and ultimately the term usage.
- If you have an
extreme close shotorclose shotand are not getting two subjects, consider pulling back and trying a more open shot, such aslong shot,wide shot, orfar shot. - Try not to be overly specific when requesting two people or more. More people means more pixel division.
Point of View/Perspective Shot
- POV/Perspective shots use a fisheye style lense to create a realistic voyueristic effect.
- POV shots will take the term
two people/men/women etcas the viewer and the subject and may keep a third person from being added.
POV Basic Prompt Structure
Simple
pov,[angle of view],view of [subject statement],[major/minor details], [setting],[lighting],[quality]
Advanced
[gender][camera distance]pov,[angle of view],view of [subject statement],[major/minor details], [setting],[lighting],[quality]
| Prompt Component | Description | Example |
|---|---|---|
| angle of view | the angle of the camera in relation to the subject | from behind, from below, from above, from the side, from over head |
| view of | keyword maker that indicates the following will be the main subject of the image | - |
| subject statement | keyword statement that includes the number of subjects | view of a woman eating dinner |
| gender | sex of the intended subject in the image | male pov,female pov,cat pov |
| camara distance | the distance between the subject and the camera | Limited use and distance in POV. far pov,mid pov |
Prompt Example
pov,from overhead,view of a woman laying on a bed,hotel lobby background, soft light, soft shadows, ultraquality>
Perspective Shots
| Perspective Type | Description | Notes |
|---|---|---|
| First Person Perspective | Provides a view from the perspective of the viewer. | Shows more of the viewer's body. |
| Second Person Perspective | May switch the perspective between subjects on some engine. | Can break the eye connection bias of the engine. |
| Third Person Perspective | Creates a removed perspective from the original subjects. | Can be combined with different angle views. Breaks eye connection bias |
| Voyeuristic Perspective | Creates a image similar to POV but with more distance control | Breaks the eye connection bias. Subjects act as if the camera isn't present. Enables creative effects and shots. |